Step 1: Take stupid selfie.
Step 2: Make it awesome!

Just kidding... There's much more involved with this. Below is a "little" tutorial on how to zombify yourself in GIMP. I tried to simplify it as much as possible by breaking it down into 7 basic steps. Screenshots are included for those who are not as familiar with the program. Originally, I wrote a quickie tutorial for my students and this is just a more in depth look at how to make yourself gory.
Pre-Set Up
Take a clear photo of yourself or as clear as you can. Mine was shot with the Samsung NX1000 while standing in my bedroom under a florescent light (f/4.5, 1/80 sec, ISO 1600).
For this to work well, don't wear any makeup and try to pull your hair out of your face because editing skin around hair is time consuming, not fun, and all around digital editing misery...
You can shoot in jpeg or raw. I shot in raw and did some minor adjustments in PSE 12 before opening the file in GIMP (Note: GIMP doesn't open RAW files so you will need to convert it to jpeg or save it as a PSD file).


Step 1 - Changing Skin Color
Once you've opened your image in GIMP, duplicate the original layer. Next you will color this second layer in the color which you wish for your skin to be. I recommend purples and greens as these seem to work best for zombies. For those new to GIMP, you can change the color of an image by any one of these options found under the Colors menu:
- Hue-Saturation
- Curves
- Levels
- Colorize
- Color Balance


Now use the paint brush tool and paint with white on the black layer mask. This will reveal the colored layer underneath wherever you paint white. As you do this, you will need to adjust your brush size to accommodate smaller areas. If you are working around areas with hair (ex: eyebrows), you will also need to lower the opacity of your brush to help make a more natural transition in color. I recommend using a soft round brush for this and leaving the colored layer at full opacity until you have filled in all areas of skin.

Once you have all your skin colored in, you can begin to make appropriate adjustments to tone down the color. The image below is my skin fully colored purple, but it's overkill and slightly like the creepy cousin of Avatars.

To fix the intensity issues, lower the opacity of your colored layer. If the resulting color still isn't where you'd like it to be, you can duplicate the entire layer with mask and do some additional adjustments as I did.

After duplicating the layer, I clicked on the color layer itself (not the mask). You will know if you are working on the layer itself as GIMP will highlight around it in white in your Layers box. Next I went to Curves under the Colors menu and did some additional adjustments.


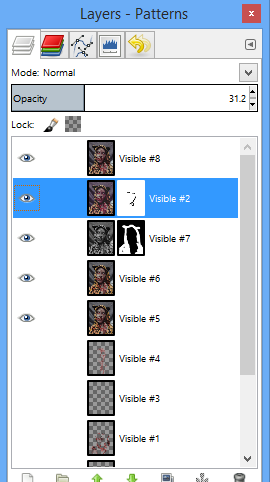
In the end I decided I preferred green to purple and the resulting skin tone had more of this. You'll also notice that I didn't color in the skin on my waterline or on my lips. This was intentional as I later colored these areas in with red to give myself the bleeding look. Once I have my skin where I like it, I tend to start merging layers to save file space (warning - GIMP may crash if you're working with multiple layers so save often). To do this, I unchecked the view eye on the original layer. When you do this you will only see your mask layers. Next go to the Layer menu and select New From Visible. This will merge the "skins" into one layer. Once you have done this you can delete the mask layers and restore the view eye on the original layer. Again, I only do this because I dislike multiple mask layers hanging around and rather have one. You don't necessarily have to do it.

Step 2: Blood Everywhere
You'll want to duplicate your original layer for this step and drag it to the top in your Layers box. Again, you will repeat the same coloring steps as in Step 1, but this time you're going red as this is your blood layer. For this image, I used Colorize and adjusted the Hue, Saturation, and Lightness levels to create a red color.

Once your layer is completely colored, you will again apply a black layer mask to hide it. Then you will paint on the layer mask with white to reveal the areas that you would like bloody. To make this as realistic as possible, you will need to change brush sizes, opacity levels, angles, and even brush shapes. Normally, I color in the eye, mouth, inner nose, inner ear, and hand areas. I also will add some blood to clothing. When adding it to clothing, it helps to use brushes that mimic the texture of clothing.

The below screenshot is my image with all of the blood added. However, I'm not done yet as there needs to be more work for it to look realistic.

To achieve a realistic effect, you will need to duplicate the blood layer. Next set the duplicated layer mode to Multiply. This will darken in the blood in some areas. You can play with the opacity levels on both blood layers as well as repaint the mask on the Multiply (dark) layer to create more realistic blood.

In my image, I didn't like how the blood looked on my hand, so I duplicated the Multiply layer. With this third layer, I desaturated the layer image itself (using Colorize again) and then painted on the mask to even out the blood intensity. I also created a singular blood layer using the New Layer from visible method after unchecking the original image. The screenshots below document some of my adjustments. Again, this takes patience and looking over the image to see what works best with it color wise.


Step 3: Dead Eyes
I like my zombies to have dead, milky colored eyes. In this step, you will again duplicate the original layer. On the duplicated layer, you will adjust the value and color. For this I used Curves under the Colors menu. Once I had them sufficiently lightened, I added a black layer mask to the duplicated layer.

Again, you will paint with white on the black layer mask to only reveal the areas you wish to change in color/value. After you have painted in the area, you can make additional adjustments to the layer's opacity levels.

Step 4: Scars
This is an optional step, but I do like to add scars to my zombies' skin. At this point, I normally create a New Layer from Visible to merge all my work into one layer on the top. Then I add a transparent layer on top of this one.

You're going to be using the paint brush tool for scars, but first you need to select a brush color. I like to match mine to the blood that's on my skin. To do this, you will use the Color Picker Tool (dropper) and select an area with blood. Make sure you are clicking on the New from Visible layer as this is where the pixels are located. This will change the color of your paint brush. Next, click on the transparent layer before you begin to do any painting. Do not paint on the New from Visible layer itself or this will make it harder to do additional adjustments.

To change your brush, go through the brush tool menu and select a shape. I prefer to use Hawksmont's crack brushes for scars. However, you may have other preferences. If you would like to download additional brushes in GIMP, Hawksmont has a tutorial for this along with their creative commons brush files (please note GIMP can open PS brush files too).

As you use the brush, you will probably want to alter its shape and angle so you don't have repetitious marks. To do this use the Tool Options box and change the Aspect Ratio and Angle. You can also change the Size and Opacity as you need.

To add depth to your scars and duplicate the transparent layer where they are applied. Next add a White layer mask to the duplicated layer as we want to see the scars still. Then change your layer mode to Multiply to darken the scars on the duplicated layer. You can make adjustments to this layer's opacity level as well, but you can also use the white layer mask to paint out any areas that you feel are too dark/strong.


Additionally, you can click on the original scar layer and apply Gaussian blur to it to help create further depth. Again, this is all something that you need to make judgement calls. It helps to zoom both in and out as you work to see what looks realistic.


Step 5: Rotting Flesh
Nothing screams zombie like foul rotting flesh! This step incorporates textures from other photos. Normally, I use photos of sand, gravel, or bark to create gross skin. You can snap a quick photo yourself or use a creative commons one (an excellent resource for creative commons texture packs is Texturemate.com). In my image, I used a photo that I had taken earlier this summer of tree bark. First open your texture image by going to File and clicking on Open as Layers. A menu will pop up and you can search for your file and open it.

Now your texture image should be on its very own layer (make sure it's at the top of your Layers box). If the image doesn't entirely cover the area of your zombie's flesh, you will need to use the Scale tool to make it larger (or smaller if you don't want giant lumps and bumps).


Once your area is sufficiently covered, apply a black layer mask to the texture layer. Again, you will be using white to paint in the areas that you wish to have your rotting flesh.


Last, you will change the color of your texture photo as most likely the original color won't fit with your image. You will click on the texture image itself in the Layers Box (GIMP will highlight it in white if you properly selected it). Next you will change the color using one of the Colors menu options. For this image I used Colorize and adjusted the levels to red. For additional adjustments, you can also change the opacity of this layer as needed.

Step 6: My Warped Mind
If you find that your original facial expression is lackluster and you wish you had a more zombie grimace, this is how you do it. GIMP has a filter called IWarp which allows you to distort your image in selective areas. First create a New Layer from Visible at the top of your layers stack. Working on this layer, use the square selection tool to select an area that you wish to distort. Then go to the Filters menu and under Distorts you will find IWarp. A small box will open with the filter.


I typically select Adaptive supersample and max out the depth and threshold levels. Admittedly, I have no idea if this makes a difference, but I do it anyway. If you know that it does or doesn't, please feel free to inform us in the comments section! For my image, I kept the deform mode as Move and adjusted the deform amount and radius as needed. To use this filter, just click on the image presented in the box and move your cursor like a paint brush, pushing the image in the direction you wish it to go. If it looks like crap, there is a handy Reset button on the filter. I did this for each of my eyes and the corner of my mouth (finished image below).

However, upon completing the IWarp, I felt that my right eye had too much shadow under it. To correct this I used dodge/burn (D&B) to dodge out the shadow. If you find areas on your zombie face having too strong of shadows or too light of highlights, you can use these steps to correct them with D&B.

First open a transparent layer on top of your warped layer. Next, select the Paint Bucket Tool and change the fill color to gray (HTML code 808080). Fill the transparent layer in with gray.

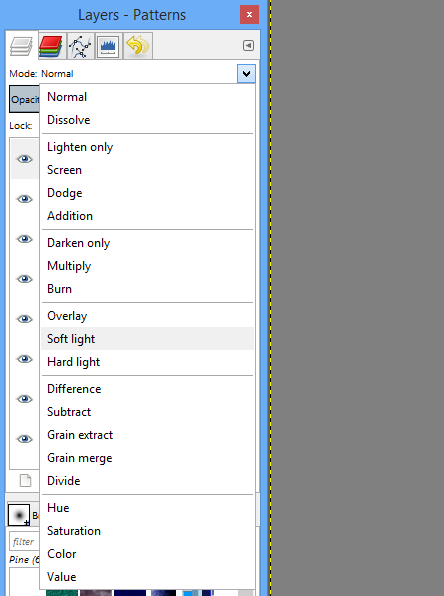
Now change this gray layer's mode to Soft Light. You will see your image again.
As you use the dodge tool on this layer, it will lighten the image underneath, but without permanently changing the image underneath. This way, if you make a mistake or it appears too light, you can adjust the opacity of the gray layer without damaging anything. Be sure that you are clicked on the gray layer as you use Dodge Burn and not on your image layer! Below is my dodged image (top) and undodged (below) to show the difference this made. It is a subtle one, but helpful.

Step 7: Final Adjustments
In this last step you are simply creating a final layer using New Layer from Visible and making any last adjustments to color and lighting. For my image, I used Curves to adjust the image's over all colors and values, then reduced the opacity of this layer. I also created a desaturated layer and used a layer mask to paint over my leopard PJs and reduce the brightness of them.

In addition to these changes, I also created a New Layer from Visible of the colored ones and then used the Unsharp Mask Filter to sharpen the entire image. Next I applied a black layer mask and only painted in the areas which I wanted to have the additional sharpening.

I also cloned in part of the curtain where it was flipped to white. You can apply a variety of techniques in this last step to polish your photo.

I hope that you have found this helpful and at the very least, entertaining. If you have any questions or suggestions, please leave a comment for me. For those who do create their own zombie looks, please share links to your creations in the comments!
Brilliant! Thanks.
ReplyDeleteToo good. Thanks for the elaborate tutorial!
ReplyDelete